In this article:
- Installing Airwallex on Odoo
- Configuring Airwallex
- Versions of Odoo are supported
- I am seeing an unregistered URL error, what should I do?
Installation
Download
To get started with the Airwallex module, download one of the supported versions: Version 16, Version 15, or Version 14.
Install module on the Odoo
After downloading the correct version, unzip the module and place it in the add-ons folder on your server. Then, log in as an administrator and navigate to the Applications menu. Click on 'Update Apps list' to refresh the module list. Finally, locate the Airwallex application and click on 'Install'.
Configure Airwallex
Application Overview
After installation, the Airwallex application will appear on the main menu. If you can't see the application, ensure that the logged-in user has the required Airwallex user access rights.

Create account and login
The first step after installation is to create an Airwallex account.
Step 1: To create an account, go to Airwallex > Configuration > Airwallex Account and create a new account.

Note: Ensure that you choose the correct environment (demo for staging or production for real credentials) while entering your credentials.
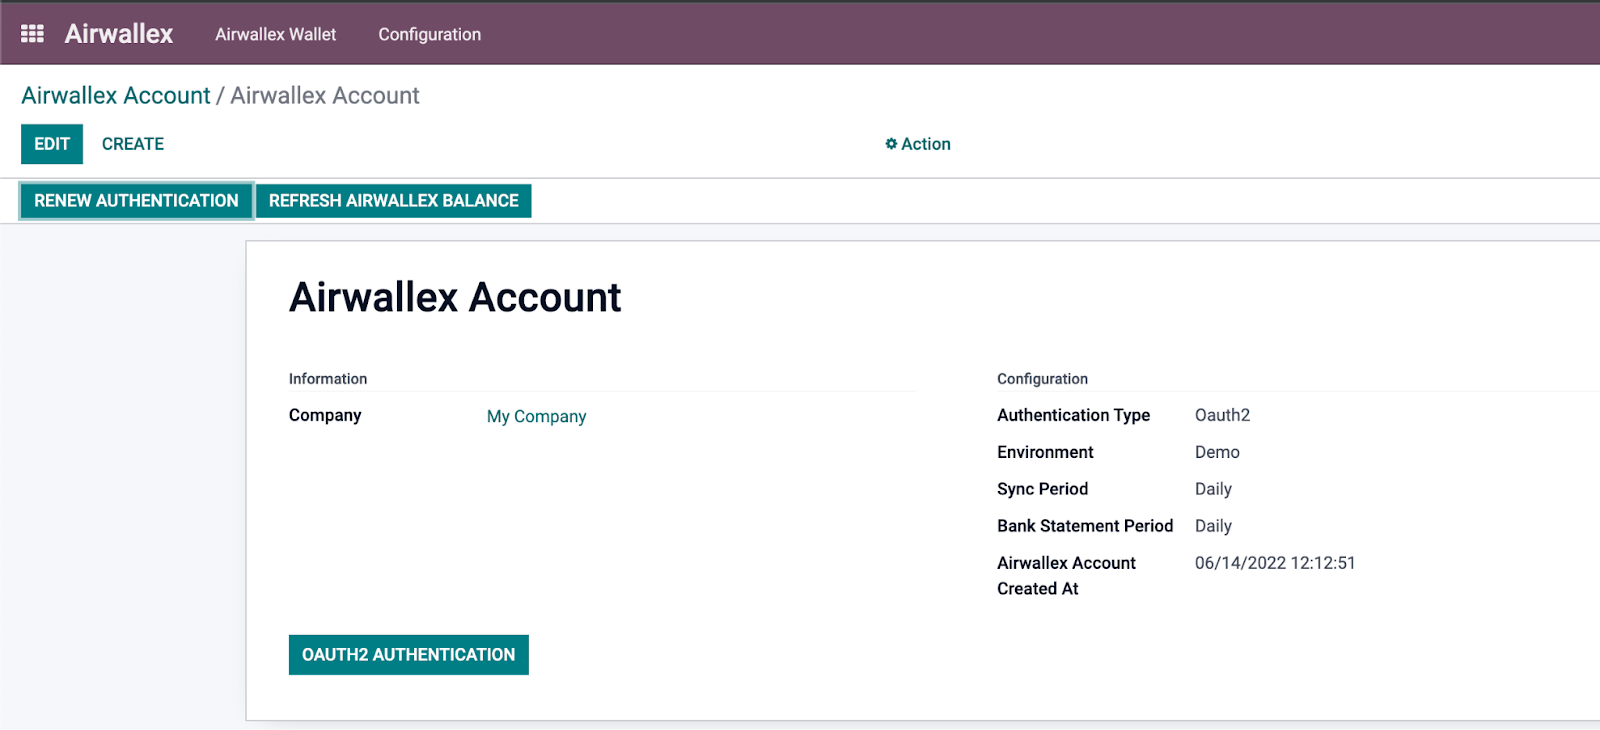
OAuth2 authentication
OAuth2 authentication is the preferred way to register an account. To get started with authentication using OAuth2, simply click on the "OAuth2 Authentication" button. This will redirect you to the OAuth2 flow where you can securely connect and authorize access to your account.
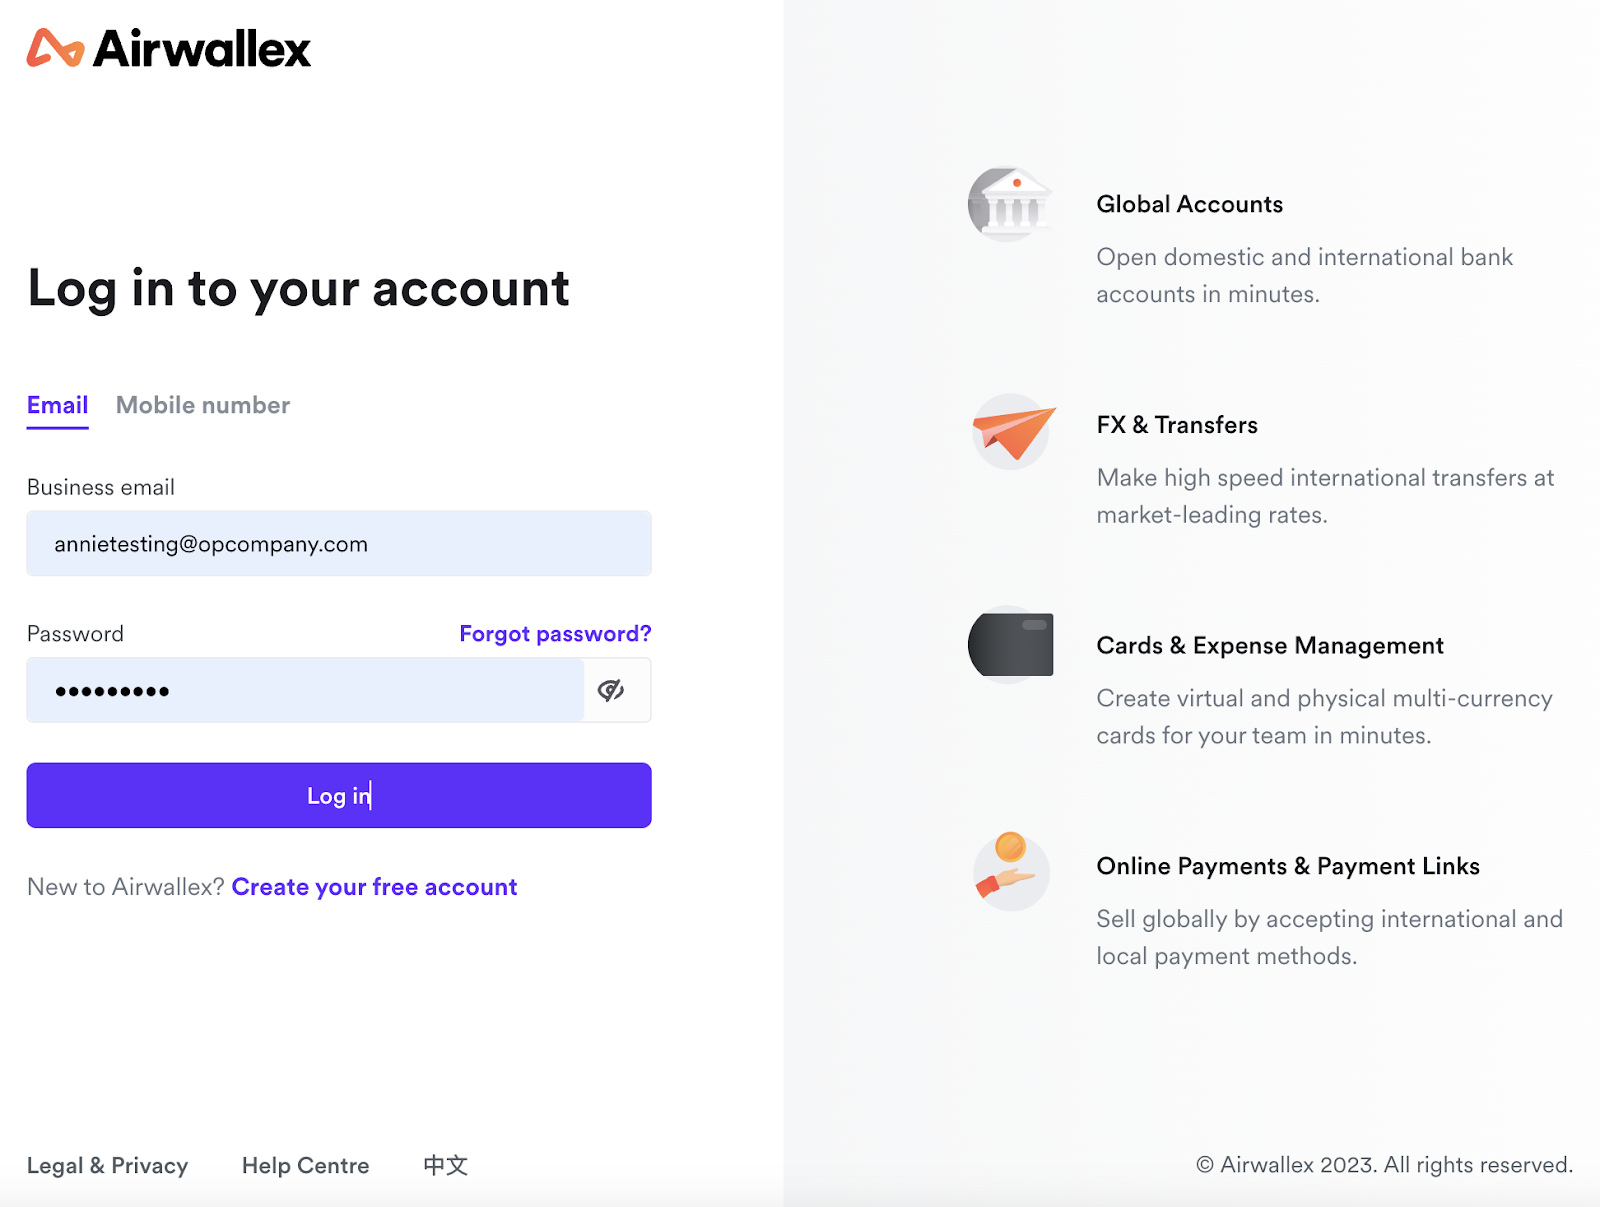
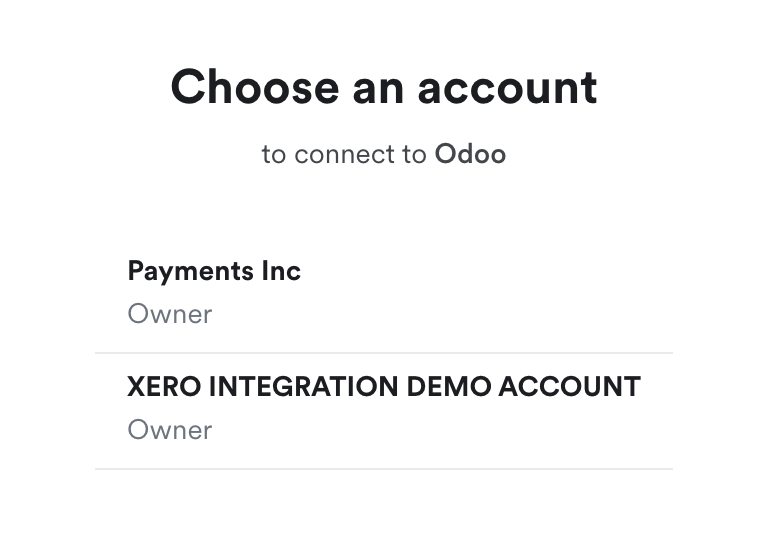
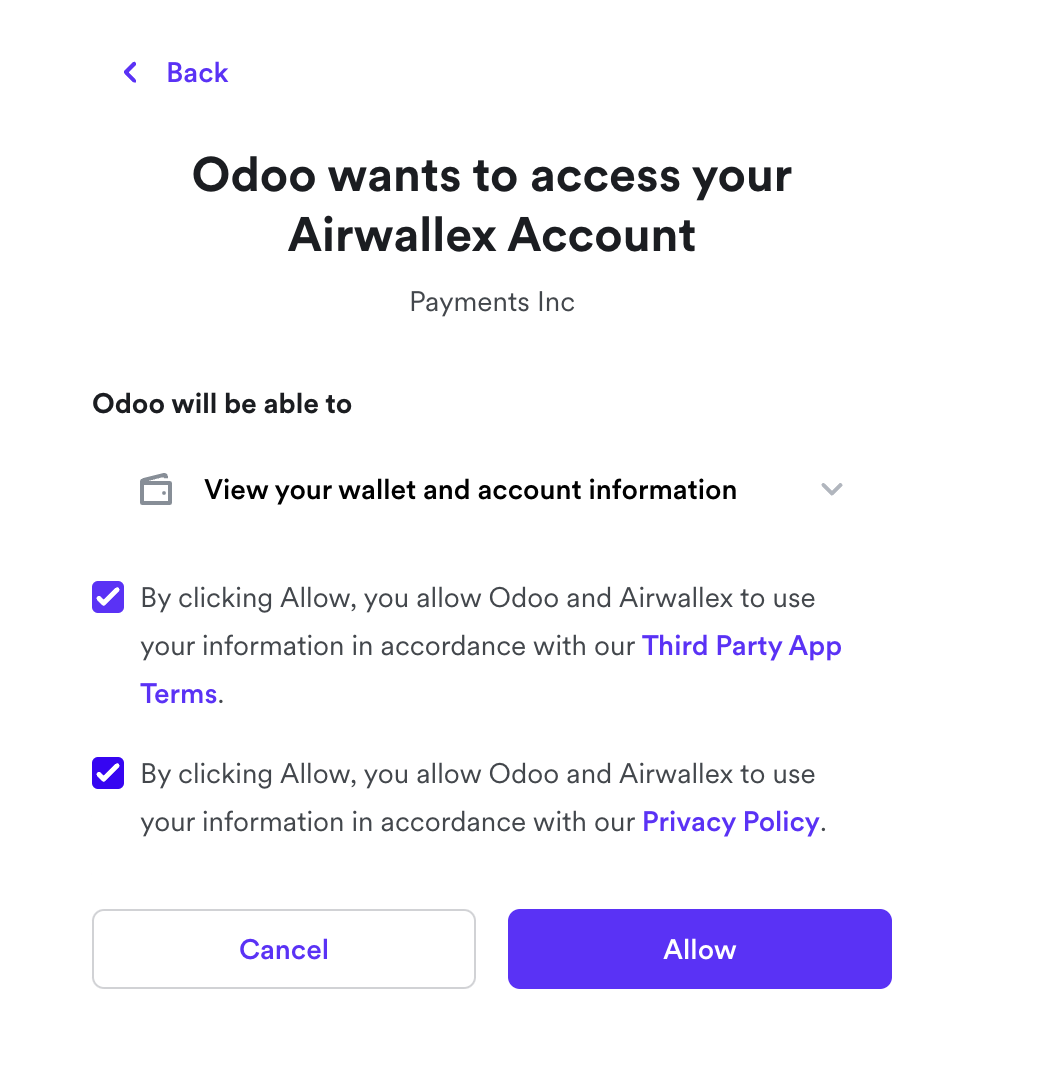
Step 2: You will be redirected to log in to your Airwallex account, select the account that you want to connect to Odoo, and review the relevant permissions that Odoo is requesting.
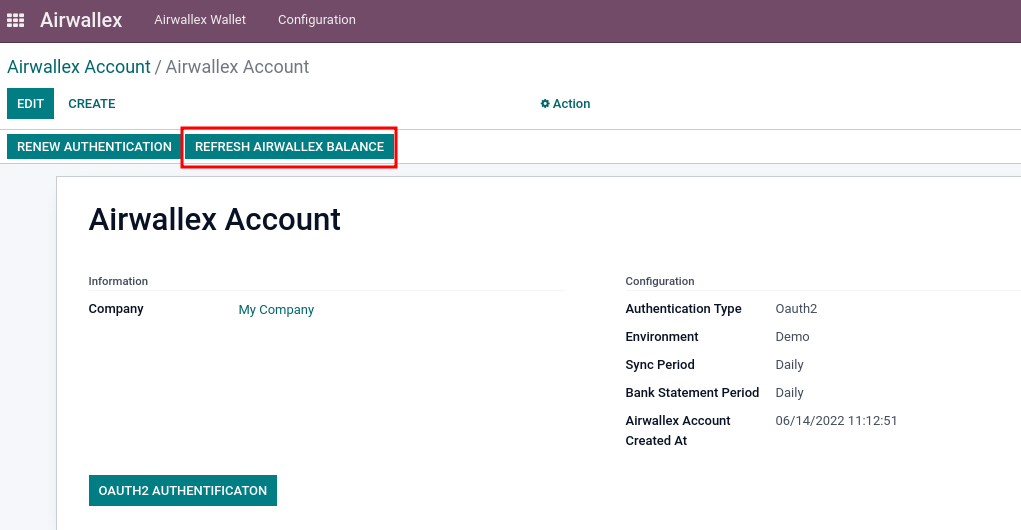
Step 3: Once connected, you will see an Airwallex account created with a timestamp. You can refresh/renew the authentication by clicking the “Renew Authentication” button.

Step 4: Click the 'Get Airwallex Balance' button to retrieve all wallet transactions from Airwallex and synchronise them with your Odoo account.

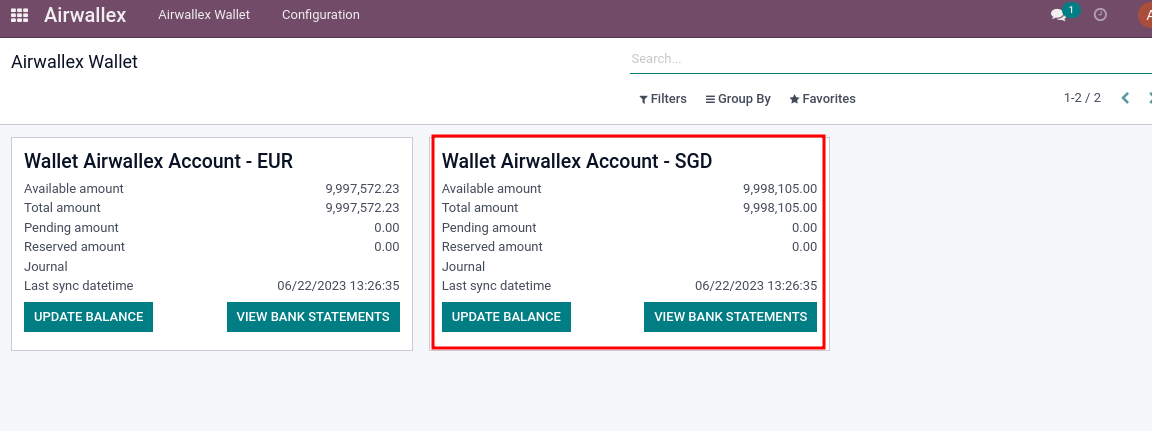
Step 5: You can check the synchronised wallets by clicking the Airwallex wallet tab.

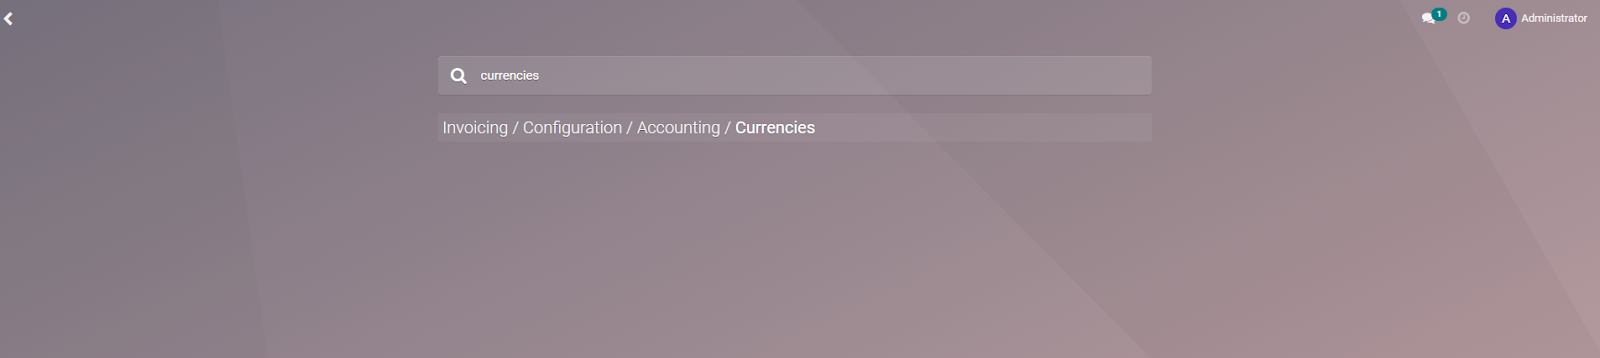
Note: We will only sync currencies that are active in Odoo - refer to section ‘2.3 Setup currencies’ below to activate more currency feeds. To activate additional currencies, search for ‘currencies’ on the main dashboard, activate the required currency, and then click on the 'Refresh Airwallex balance' button.

Step 6: On the account page, you can choose the frequency of Airwallex balance update and bank statement posting. For more information, refer to the field “Sync Period” and “Bank Statement Period” below.

Note: The bank statement feature has been removed in version 16, so there is no need to post the bank statement.
Setup currencies
In Odoo, we can only synchronize an Airwallex wallet if the currency is active in Odoo. Therefore, if a wallet is not syncing in Odoo, check the status of the currency by searching for ‘currencies’ on the main dashboard or Open menu Invoicing→Configuration→Currencies.
You can activate the required currency on this page by clicking on the "Active" column of the currency record.
- If the "Active" button is green, it indicates that the currency is already active.

Then, go back to your Airwallex account and click on the button ‘Refresh Airwallex balance’
Now, you can see the new currency feed setup in your Airwallex wallet.
Journal Creation
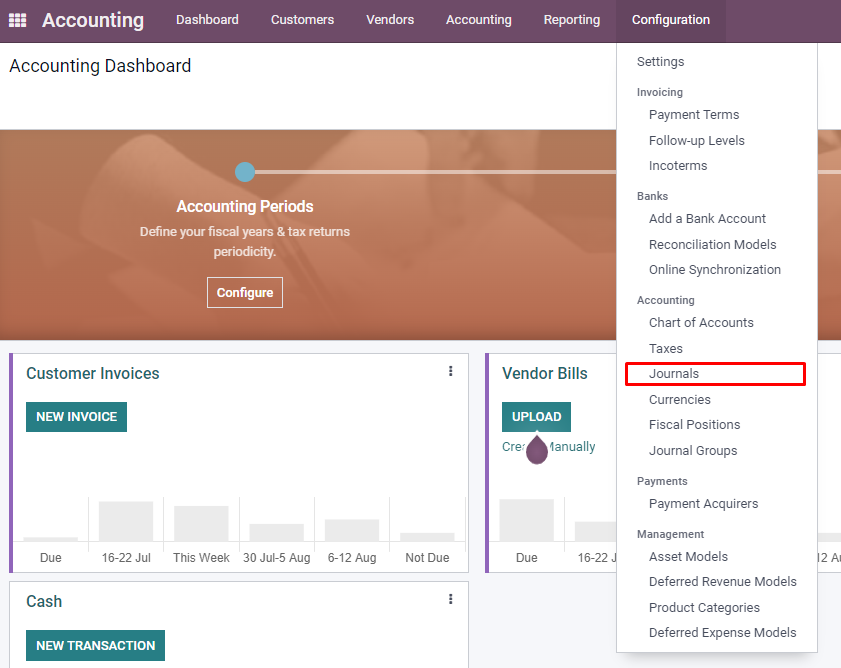
- Click on Accounting menu
- Choose Configuration → Journals menu
-
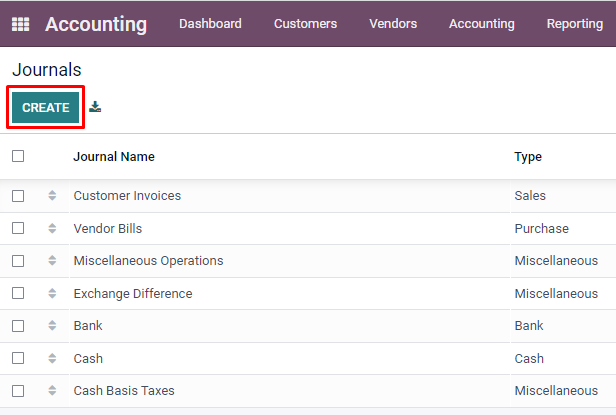
Click on Create button
-
Fill the data to Journal form
- Journal Name: filled with the name of the journal
- Type: filled with the type of journal
- Bank Account: filled with a bank account
- Suspense Account: filled with bank intermediary account
- Profit Account: filled with profit account
- Loss Account: filled with a loss account
- Short Code: filled with the code for the journal created
- Account Number: Fill with the bank account number
- Click Save button
Initiate your bank account journal
This is the last step to synchronize transactions from your Airwallex wallet to Odoo. Click on the Airwallex wallet that you want to configure and then click on the 'Edit' button.

Note: Only user with Airwallex administrator role can see the edit button
After clicking on the 'Edit' button, you will be shown a dialog box

- The journal you want to assign the wallet to
- The initialization method
- Import historical data - Will import all the data starting from the chosen date
- Set initial balance - Will create only one record with the current balance
- None - Will not initialize the journal
Choose the journal and the method according to your needs.
In the following example, we will Import historical data

Once you click on 'Apply', Odoo will fetch all the records until the chosen date and create a bank statement record with all the lines.
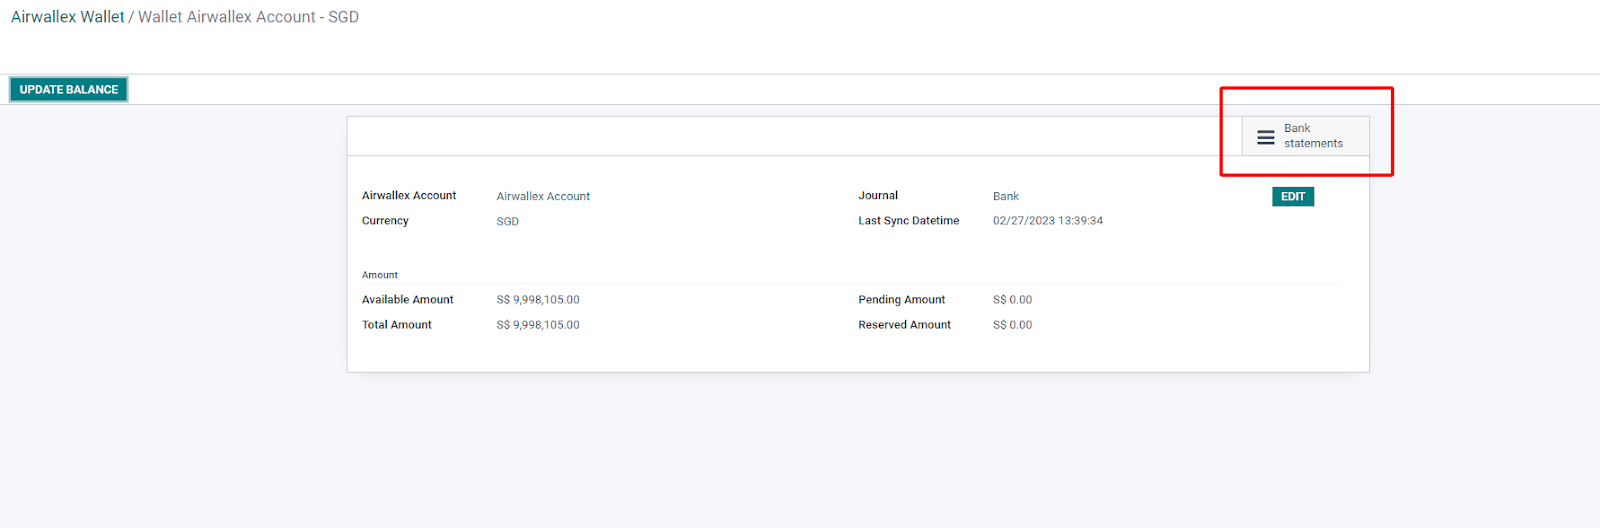
You can see the bank statement by clicking on the ‘Bank Statements’ button on the top right:

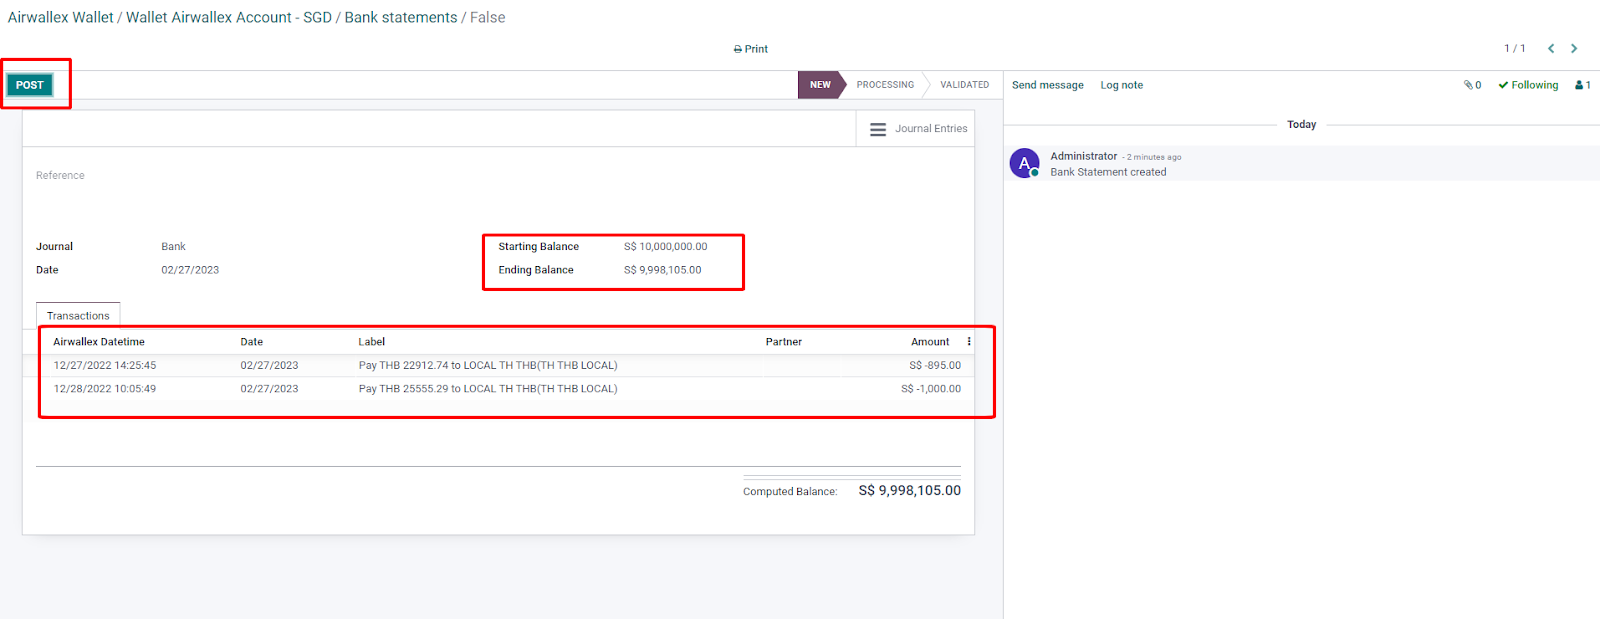
You can also verify the values imported and post the bank statement
Advance configuration
Refresh frequency
On the Airwallex account configuration page, you can set up the sync frequency (hourly, daily or weekly) for Odoo to import information from Airwallex.
To set up the refresh frequency, you can access the feature through the search function if you have an ‘Admin’ role and are in developer mode. The scheduled action is performed using ‘Airwallex.account.ir.cron’ to fetch information from Airwallex.

You can modify the value here to select your preferred refresh frequency:

What versions of Odoo are supported?
The Airwallex integration is compatible with the latest Odoo versions 14, 15, and 16.
I am seeing an unregistered URL error, what should I do?
If you are using an on-premise version of Odoo, we will have to whitelist your callback URL. Otherwise, you will see the following error message. Please reach out to your account manager or contact our customer support team to add the callback URL.
